JDK 11
To install JDK 11, click the following download link and install the download:
https://www.oracle.com/technetwork/java/javase/downloads/jdk11-downloads-5066655.html
git
To install git, follow the instructions in the following online book:
https://git-scm.com/book/en/v2/Getting-Started-Installing-Git
IntelliJ
To install IntelliJ, click the following download link and install the download:
https://www.jetbrains.com/idea/download/download-thanks.html?code=IIC
We have chosen IntelliJ, because it’s a state-of-the-art Java IDE. If you use Java in the real world, you will almost certainly use IntelliJ again. If you prefer to use a different editor or IDE, you are welcome to, but we will be unable to support it. Note that VSCode, while a great editor, does not have support for running tests in the way CS 2 uses them; so, we would not recommend using VSCode.
Project and Lab Setup
In this course, we will be using git to download and submit the labs and projects. git is version control software which will keep track of the
changes you make. For our purposes, you will need to learn how to clone, commit, push, and pull (which we will explain below).
To get the starter files, you will need to use the registration tool which can be found at:
https://grinch.caltech.edu/register
You should begin every remaining lab and project in this course by going to the registration tool. Different options will be available for different assessments, and you should be careful to note how much collaboration is allowed for each individual one.
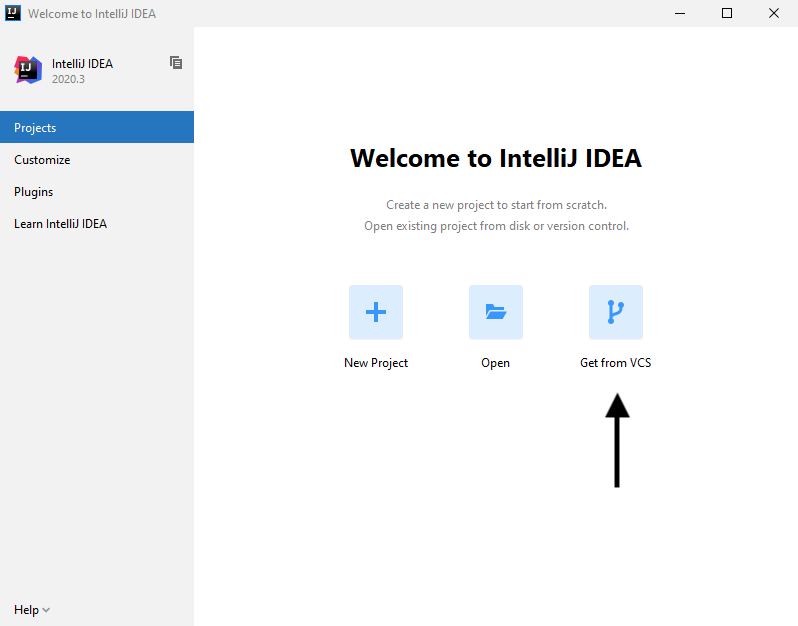
Once you receive an e-mail indicating that your project repository has been created, you should open IntelliJ. There will be an option to “check out” a project from version control. Click this option and select “git” in the pop-up menu:
Next, a “Get from Version Control” box will pop up. Type in the URL in the e-mail you received from registration@gitlab.caltech.edu and click “Clone”. A pop-up box will ask
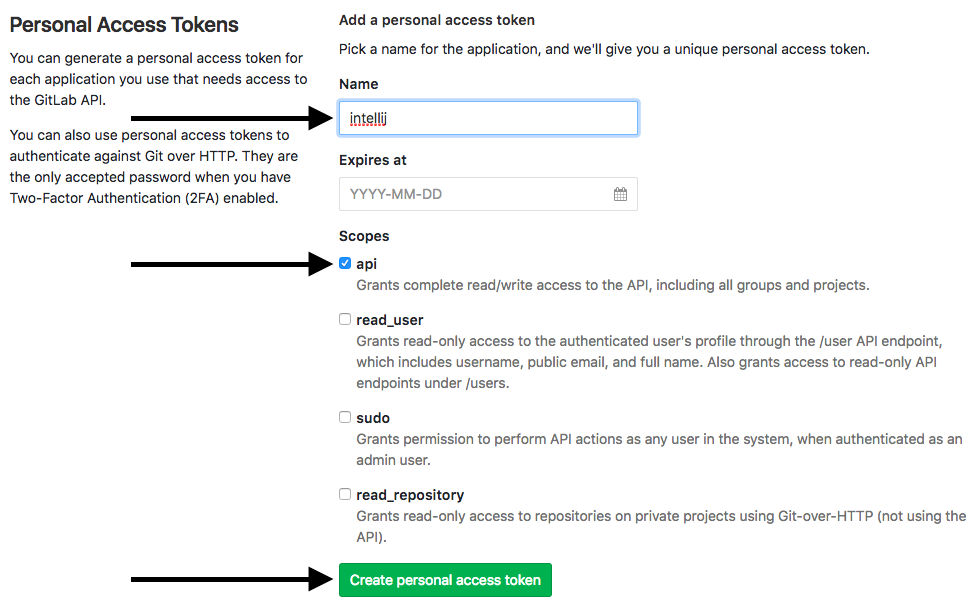
for your username and password. The username is your Access Caltech username. We need to generate the password. Go to:
https://gitlab.caltech.edu/profile/personal_access_tokens
The page should look something like the following image. Type in a name (we recommend “intellij”), check the API box, and click “Create personal access token”.
The page should refresh and give you a password-looking string where the black box is in the below image.
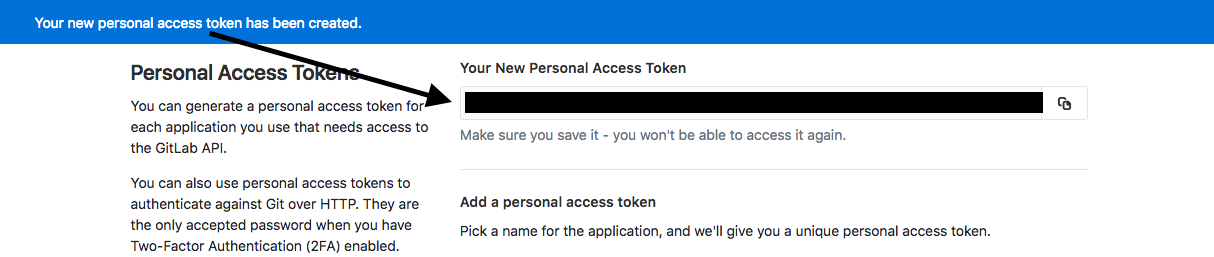
Copy that string, and paste it into the password box in IntelliJ. Make sure the “remember” box is checked or save the password somewhere. Click OK, and IntelliJ will finally create your project. You will not have to create the token ever again, but you will need to clone a repository for each lab and project.
Now that the project is created in IntelliJ, you are finally ready to begin the project or lab.
If the files do not appear, click the first button on the left side of the screen.